
Strengthening Your AWS Infrastructure: A Hands-On Guide with AWS Web Application Firewall (WAF)
Day 2: Building a Secure Foundation with WAF


Introduction:
Welcome back to the 7 Days of AWS challenge! Today, we're diving deep into fortifying our infrastructure with AWS Web Application Firewall (WAF). Let's explore the essentials of WAF and embark on a hands-on project to enhance our security measures.
Understanding AWS Web Application Firewall (WAF):
AWS Web Application Firewall (WAF) serves as your shield against malicious attacks on web applications. It enables the creation of custom rules to filter and monitor HTTP and HTTPS requests, offering granular control over incoming traffic. Integrated seamlessly with Amazon CloudFront and Application Load Balancers, WAF empowers you to safeguard your applications effectively.
To begin, navigate to the AWS WAF console, where you can create WebACLs (Access Control Lists) to define rules governing allowed or denied requests. These rules can include conditions such as IP addresses, geographic locations, and custom rules based on request content.
Hands-On Project: Building a Secure Infrastructure
Step 1 - Creating a Launch Template:
Navigate to the EC2 Dashboard and locate the "Launch Templates" section.
Click "Create Launch Template" and configure settings like AMI, instance type, and storage.
In the "Advanced Details" section, paste the provided script to deploy a todo list web app from a Docker image.
   #!/bin/bash

   # Update the package list
   sudo apt-get update -y

   # Install Docker
   sudo apt-get install -y docker.io
   sudo systemctl start docker
   sudo systemctl enable docker

   # Pull the Docker image from DockerHub
   sudo docker pull sandhyadeotare26/todo-app:latest

   # Run the Docker container, exposing port 8001
   sudo docker run -d -p 80:8001 sandhyadeotare26/todo-app:latest
Save the template.
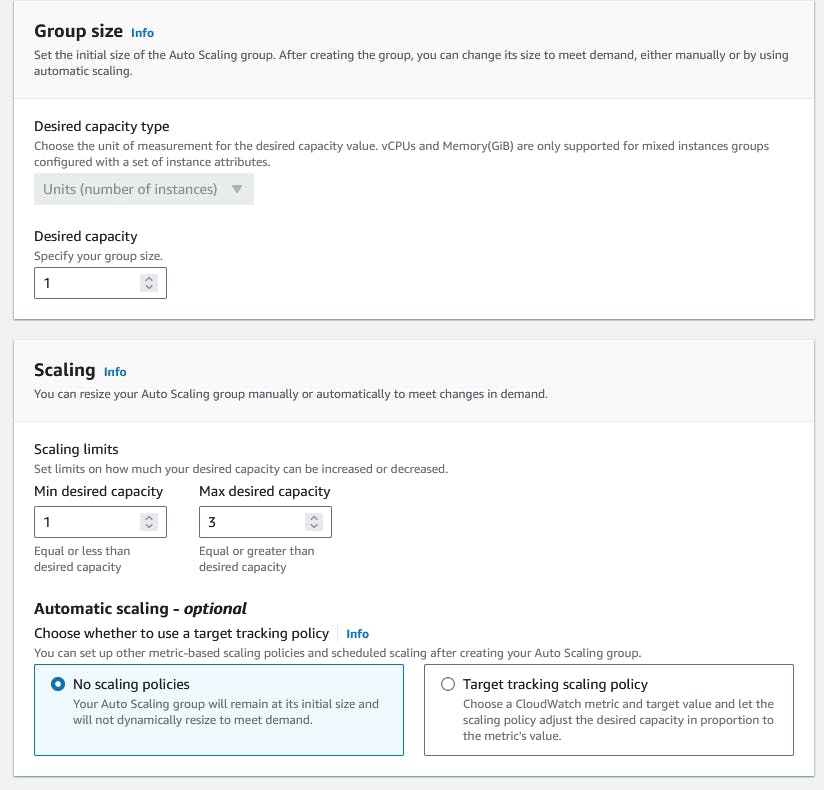
Step 2 - Auto Scaling Group (ASG):
In the EC2 Dashboard, under "Auto Scaling Groups," click "Create Auto Scaling Group."
Select the Launch Template you created.
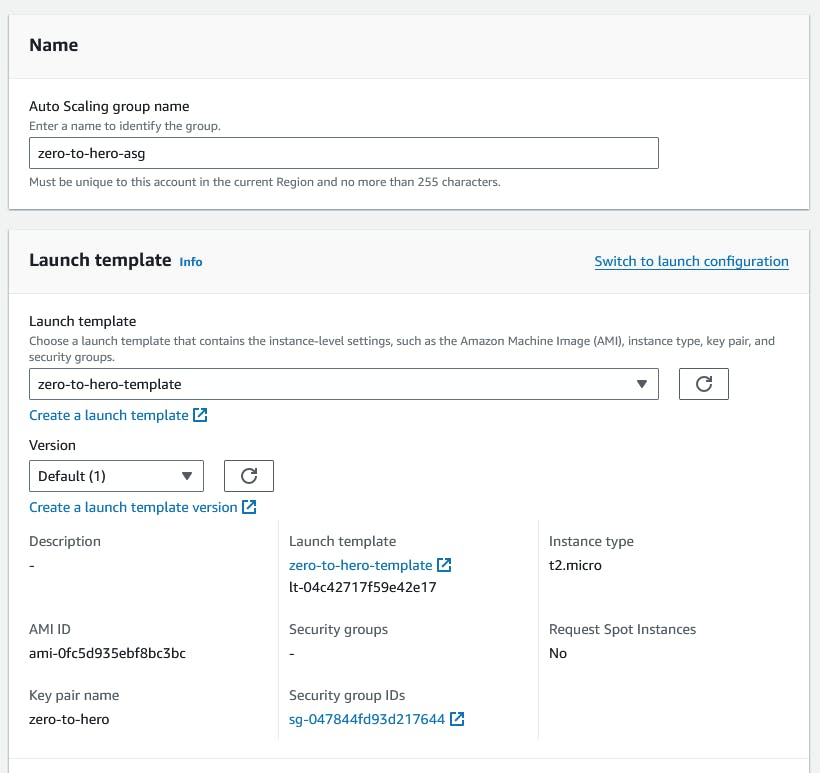
Configure scaling policies, desired capacity, and other parameters.
Complete the setup.
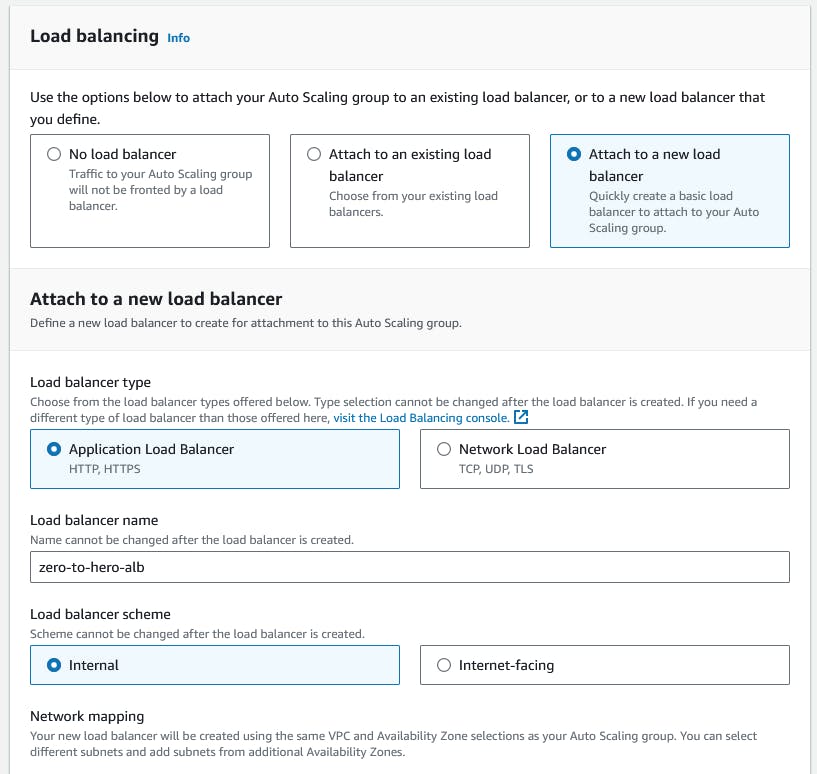
Step 3 - Application Load Balancer (ALB):
Navigate to "Load Balancers" in the EC2 Dashboard and click "Create Load Balancer."
Choose "Application Load Balancer" and configure listener configurations.
Add instances from your Auto Scaling Group to the target group.
Securing Your Infrastructure with WAF:
Step 4 - Configuring WAF WebACL:
In the AWS WAF console, go to WebACLs and click "Create WebACL."
Define conditions for your WebACL, specifying rules to allow or block requests.
Associate the WebACL with your Application Load Balancer.
By configuring a WAF WebACL, you add an additional layer of protection to your applications, safeguarding them against various cyber threats.
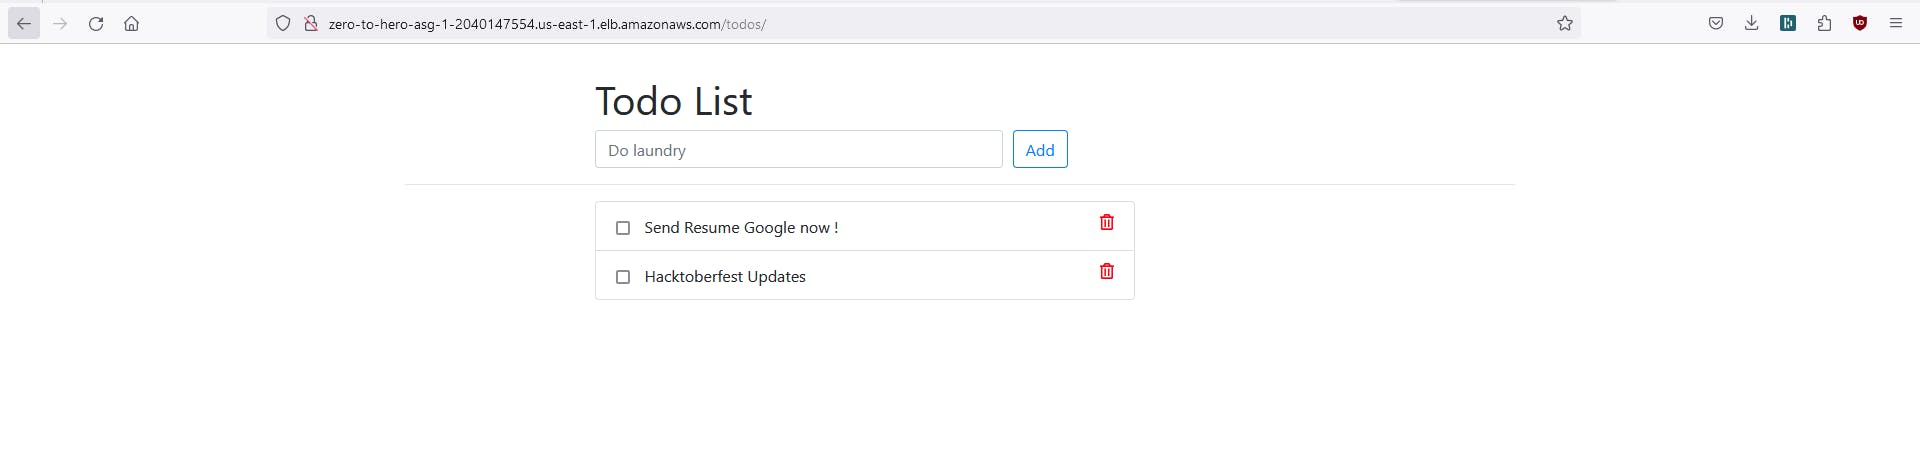
Step 5 - Testing the Todo App:
Open your web browser and navigate to:
http://<Your_Load_Balancer_DNS_Name>:80Replace
<Your_Load_Balancer_DNS_Name>with the DNS name of your Application LoadReplace
<Your_Load_Balancer_DNS_Name>with the DNS name of your Application Load Balancer.If configured correctly, you should see your todo list web app in action.
Conclusion:
Congratulations on strengthening your AWS infrastructure on Day 2 of the challenge! Understanding AWS Web Application Firewall and implementing secure projects with launch templates, auto-scaling groups, and application load balancers are pivotal steps in your AWS journey.
Stay tuned for Day 3, where we'll explore more AWS services to optimize and enhance your cloud experience. Remember, each day brings us closer to mastering the art of AWS. Stay curious, stay adventurous!
Happy Learning🚀🔒